
I hope you all had a great week and weekend. I got to enjoy a couple of snow days this past week while I recovered from a cold. Only the cough lingers on.
Okay, onto a much more enjoyable topic: stamping!
I was able to spend a short time on Sunday afternoon in my crafting space, and I really enjoyed making this card - it really has a "frosty" feel to it don't you think?
I also had Christmas music playing while I created and hummed away :)
I hope you like this card! Because this quick project only uses one color (besides white) you can choose any color combination you choose. Enjoy!
Have a wonderful week and I hope you get more of your pre-Christmas "todo's" done!
Happy Inky Smiles
I also had Christmas music playing while I created and hummed away :)
I hope you like this card! Because this quick project only uses one color (besides white) you can choose any color combination you choose. Enjoy!
 |
 |
| Close-up if card front - here you can see the "hoosh' of Craft White ink over the greeting |
 |
| Inside of card |
Happy Inky Smiles

Stampin' Up! Products Used:


Tips to re-create this card:
Cut:
Cardbase in Whisper White Thick: 8 1/2" x 5 1/2" and folded in half to create card base :)
Mat pieces in Whisper White: 5 1/4" x 4" and 4 1/8" x 2 5/8"
Stamp piece in Wisteria Wonder: 4" x 2 1/2"
Now:
1. Use embossing buddy to rub over stamp piece.
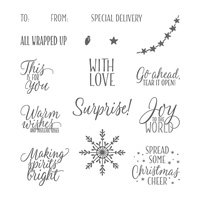
2. Ink up saying with VersaMark Ink and stamp onto center of your stamp piece (use your Stamp-a-ma-jig if necessary). Dip into silver embossing powder and heat set.
3. Sponge the edges of the stamp piece with Wisteria Wonder ink.
4. Sponge Whisper White Craft ink over the embossed saying.
5. Take a piece of tissue and rub over the embossed saying so as to remove any remaining ink. This creates a "foggy" or "chalky" hoosh to your stamp piece. (You can also omit this step if you wish).
6. Take your stamp piece and temporarily stick to the center of the large background mat.
7. Using Wisteria Wonder ink, stamp the snowflakes randomly over the stamp piece and the background matting.
8. Remove the stamp piece from the large background that now has partial stamped images of snowflakes.
9. Attach your small mat piece to the stamp piece.
10. Add Stampin' Dimensionals to the backside of your matted stamp piece and attach to the background mat.
11. Attach the whole matted "sandwich" to your cardbase.
12. Now take out the Basic Rhinestone Jewels and apply to the card front whereever you wish! (Check photo for placement if you need ideas.
13. Stamp the inside of your card with another greeting.
14. Remember to stamp your envelope too :)
Now you have a card ready to send out too - whoo-hoo!
Cut:
Cardbase in Whisper White Thick: 8 1/2" x 5 1/2" and folded in half to create card base :)
Mat pieces in Whisper White: 5 1/4" x 4" and 4 1/8" x 2 5/8"
Stamp piece in Wisteria Wonder: 4" x 2 1/2"
Now:
1. Use embossing buddy to rub over stamp piece.
2. Ink up saying with VersaMark Ink and stamp onto center of your stamp piece (use your Stamp-a-ma-jig if necessary). Dip into silver embossing powder and heat set.
3. Sponge the edges of the stamp piece with Wisteria Wonder ink.
4. Sponge Whisper White Craft ink over the embossed saying.
5. Take a piece of tissue and rub over the embossed saying so as to remove any remaining ink. This creates a "foggy" or "chalky" hoosh to your stamp piece. (You can also omit this step if you wish).
6. Take your stamp piece and temporarily stick to the center of the large background mat.
7. Using Wisteria Wonder ink, stamp the snowflakes randomly over the stamp piece and the background matting.
8. Remove the stamp piece from the large background that now has partial stamped images of snowflakes.
9. Attach your small mat piece to the stamp piece.
10. Add Stampin' Dimensionals to the backside of your matted stamp piece and attach to the background mat.
11. Attach the whole matted "sandwich" to your cardbase.
12. Now take out the Basic Rhinestone Jewels and apply to the card front whereever you wish! (Check photo for placement if you need ideas.
13. Stamp the inside of your card with another greeting.
14. Remember to stamp your envelope too :)
Now you have a card ready to send out too - whoo-hoo!
No comments:
Post a Comment