Monday, January 30, 2017

Love Sparkles Meets Balloon Adventures

Happy Monday!
I hope you have a great weekend!  Mine was fun as I held my open house yesterday and I was able to spend some time with some of fellow stamping friends.  Loved the creative time!

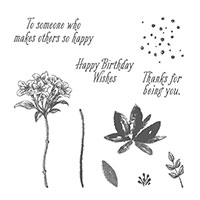
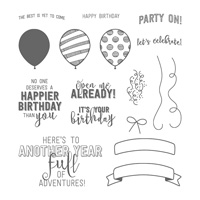
Today I have a card to share with you that was really fun to create!  I am still playing with Stampin' Up! stamp set Love Sparkles and I combined it with Balloon Adventures.  I hope you try to make it too!  My Mom loves it!
A fun collage rendition!
Close-up of top portion of card

Close-up of bottom portion of card!


Inside of card

And another collage rendition using same stamp sets and placed into a photo frame:


Another similar stamped masterpiece
placed into a photo frame!

Happy Inky Smiles


Stampin' Up Supplies Used:

Tips to help you recreate this card:
Cut:
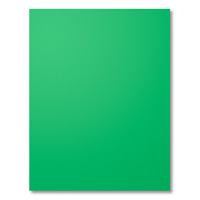
Cucumber Crush cardstock: 8 1/2" x 5 1/2"
Basic Black cardstock for mat: 5 1/8" x 3 7/8"
Whisper White cardstock: 2 pieces cut 5" x 3 3/4"
Next:
1. Fold Cucumber Crush in half to create your card base (5 1/2" x 4 1/4")
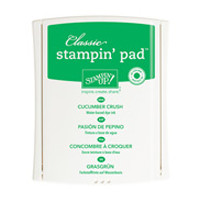
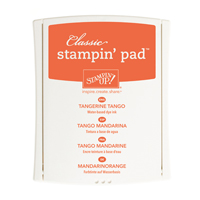
2. Set up your ink pad colors: Basic Black Archival for greetings; Tempting Turquoise for solid balloons; Cucumber Crush for striped balloon; Tangerine Tango for star; Rich Razzleberry for heart
3.  Ink up your selected image and then stamp it 3 or 4 (or 5 for heart) times without reinking.  This gives you the different shadings.  I started out with the solid balloon and then I followed with: striped green balloon, greetings, star and last the heart.
4.  I stamped the star on the inside of the card too. (Go ahead and change it up! It's okay to do so :))
5.  Glue your stamped masterpiece to the black cardstock mat and then glue this to your green card base.
6.  Glue your inside piece to the inside of the card.
7.  Glitter up your card with Rhinestone Basic Jewels and you are done!!!  ---except remember to stamp your envelope and sign the back of your card!
Have a wonderful week!

Saturday, January 28, 2017

Favorite 2017 Occasions Stamp Set - Blog Hop


Happy Saturday, and welcome to the Seashore Stampers blog hop!
Today we are sharing a project using our favourite Stampin' Up stamp set from the 2017 Occasions Catalogue.  Okay, I definitely don't have a "favourite" stamp set so to speak, but I definitely have a "few" stamp sets I can't wait to play with!

So, for today, I am sharing two cards using the wonderfully versatile stamp set called "Love Sparkles" and because Valentine's Day is just around the corner, one card had to use hearts!

I hope these two cards provide you with some stamping inspiration and that you try making one of them yourself!


Which one to make? Good thing all images are in one stamp set!


The Heart card

The Star card


Close-up of heart card

Close-up of star card


Now please go to the next stop on the Blog hop for some more stamping inspiration:


Erica
Adrienne


Happy Inky Smiles!


Stampin' Up! Products Used:


Tips to Recreate These Cards:
Cut:
Cardbase: One sheet of Whisper White Thick cardstock cut in half lengthwise (11" x 4 1/4")
Basic Black cardstock for matting: 2 x 5 1/4" x 4"
Whisper White cardstock for stamping: 2 x  5" x 3 3/4"
For the Heart card: 
1.  I used inks in Rich Razzleberry, Tangerine Tango and Flirty Flamingo and Basic Black
2.  I used the size B Acrylic block and used the flat side to ink up the block, spritz with a bit of water and then apply to card base using the following inks (from bottom of card upwards): Rich Razzleberry, Tangerine Tango and last, Flirty Flamingo
3. Next I used Basic Black to stamp my greeting
4. Then I inked up the heart image with Rich Razzleberry and stamped that onto my card piece
5.  I then punched out a strip of hearts from a bit of scrap Rich Razzleberry cardstock using the Confetti Hearts Border punch.
6. Last I applied a few Rhinestone Basic Jewels.
7.  Glue completed stamped piece to black cardstock mat and then glue this to your card base.
For the Star card:
1. I first stamped the greeting at an angle using Basic Black Ink.  
2. I then stamped the star onto the card piece as shown using the following ink colors:  Daffodil Delight, Tangerine Tango, Flirty Flamingo, Bermunda Bay and Cucumber Crush.
3.  Next I attached a few Rhinestone Basic Jewels as shown in pictures.
4.  I glued the stamped piece onto the Basic Black carstock mat piece and then glued this to the cardbase.

For both cards I also stamped the heart/star to the inside of the respective card.
All that is left for you to do is stamp a matching envelope and send to someone you love.


Monday, January 23, 2017

Happy Birthday - Avant Garden CASE Card

Hello Stampers!
Welcome to today's post!
I am still working with the Avant Garden Stamp set from Stampin' Up!  I have not gotten tired yet creating  with this stamp set - it is so versatile - and it works well with other stamp sets too! 

What I did this time round is CASE the card from page 5 of the 2017 Sale-A-Bration Brochure put out by Stampin' Up! and I did it in two colorways (oranges and then greens). Which one will you make?
Enjoy!
The first card is using Peekaboo Peach and Tangerine Tango cardstock
The second card I made (because a fellow stamping buddy loves the color green)
using Emerald Envy and Pumpkin Pie cardstock
Close-up of card front showing placement details
Inside of cards (I used same image and placement in both cards)
Both cards side-by-side for comparison

Have a wonderfully crafty week and see you again here soon!


Stampin' Up Products Used:

Tips to re-create the card:
Cut:
Peekaboo Peach (Emerald Envy): 8 1/2" x 5 1/2"
Whisper White: 5 1/8" x 3 7/8" (stamped piece) and 5 1/4" x 4" for the inside of the card
Scrap of Whisper White to stamp flower spray and greeting 2" x 4"
Scrap of Mint Macaron 4" x 1/2" (one end gets a diagonal cut and then the ribbon goes on top)
Scrap of Tangerine Tango (Pumpkin Pie) to punch out a 2" circle
Next:
1.  Using Hardwood background stamp, ink up with Mint Macaron and place your smaller Whisper White cardstock over inked image and ink the "wood image" (Once I have placed my Whisper White onto the background stamp, I like place a piece of scrap typewriter paper over the whole thing and then I run my brayer over the whole stamp to get my image onto the cardstock - and it keeps my brayer clean from ink!).
2.  Attach the inked cardstock to your card base.
3.  Ink up the flower spray with Basic Black ink and stamp onto scrap piece of Whisper White (then, without re-inking, stamp the flower spray onto the "inside" piece of Whisper White cardstock. (For the orange card, I stamped the black inked image off first before I stamped it onto my scrap piece of Whisper White cardstock giving me a lighter impression of the image to color.
4. Color your inked spray using Crushed Curry, Melon Mambo, Pumpkin Pie and Mint Macaron inks and the blender pen (I pick up my ink with the blender pen and then color the image).
5. Fussy cut your colored image being careful not to damage the stem of the flower spray.
6. Ink up greeting of your choice with Basic Black ink and stamp onto scrap of Whisper White cardstock.
7.Fussy cut greeting as desired (look at photos for ideas).
8.  Punch circle out of Tangerine Tango (Pumpkin Pie)cardstock and emboss using the Woodgrain TIEF.
9.  Cut one end of a 4" strip of Peekaboo 3/8" Ruched ribbon (Emerald Envy) diagonally before applying to the Mint Macaron strip of cardstock with Fast Fuse adhesive. Then cut the cardstock diagonally to shadow the diagonally cut ribbon end. 
10.  Cut gold (silver) metallic doily in half and apply one half doily to back of ribboned Mint Macaroon piece as shown in photo.
11. Apply ribbon/doily strip to card using adhesive of choice (I used Multipurpose glue).
12. Attach the other half doily to back of embossed circle and then attach circle to card base with Stampin' Dimensionals as shown (the circle goes off the right edge of the card and you then cut the overhanging put of the circle flush with the card edge.
13. Now apply your colored and fussy cut flower spray to the circle with Stampin' Dimensionals (I applied dimesions to the the flower head part of the cut image).
14.  Using about 6" or 8" of linen thread tie a bow around the stem as shown in photo and place a mini glue dot behind the bow knot to keep it in place.  I then tied a small knot to each of the ribbon ends.
15.  Glue your greeting in place as shown.
16.  Apply Pearl Basic Jewels (Rhinestone Basic Jewels) to the card as shown (and/or as desired!).
17. Apply Wink of Stella over the flower heads on the spray.
Whoo-hoo, you are done!
Enjoy!