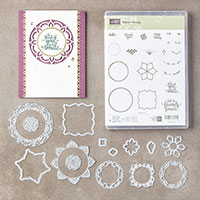
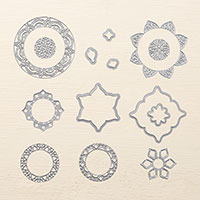
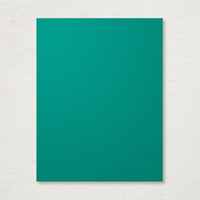
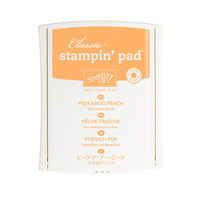
Showing posts with label Eastern Medallion Thinlits. Show all posts

Monday, June 12, 2017

Eastern Folded Beauty Notecard

Hello fellow stampers!
Welcome, and I hope today's post gives you another creative idea to work with.
My card was adapted from a very neat video tutorial I watched a while ago on Splitcoast Stampers, which I want to share with you.  Please watch it here.   

Card front - unique fold

I wanted to try a different style of card because a few of my stamping friends are trying out uniquely folded cards.  So this is my inspiration using, again, my present favourite stamp set from Stampin' Up!: Eastern Beauty!  I hope you give it a try as well! Once I got the folding/scoring down, the card came together quite easily.
Close-up of card front

Inside of card

Back of card - couldn't just let it stay plain!
Enjoy your week everyone!
Happy inky smiles


Stampin' Up Supplies Used:
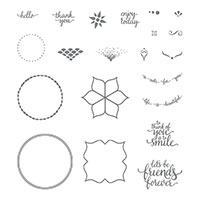

Tips and Tricks to recreate this card (and following the video tutorial link above):
Cut:
Tranquil Tide cardstock for card base:  8 1/2" x 5 1/2" 
Peekaboo Peach cardstock:  4 1/4" x 2 1/2"
Whisper White cardstock: 2 pieces 2 3/4" (one for front and one for back of card; and one piece 4 1/4" x 2 1/2" for inside of card.
Next:
1. Follow the well-explained video tutorial to get your cardstock base folded into the card base.
2. Using the stamps in the Eastern Beauty Stamp set, ink up the flower shape with Tranquil Tide ink and stamp onto the two square pieces of Whisper White cardstock.
3.  Stamp the Peekaboo Peach cardstock piece as shown in photo with Peekaboo Peach ink and the greeting in Tranquil Tide ink.
4. Stamp the remaining Whisper White cardstock rectangle as desired - this is for the inside of your card.  I stamped the corners with Peekaboo Peach.
5.  Glue all your inked pieces onto your cardbase.
6.  Add the largest basic pearls onto the card front as shown.
7.  Decorate your envelope as desired.
Whoo-hoo!  Enjoy your card creation - you did great! 


Monday, May 29, 2017

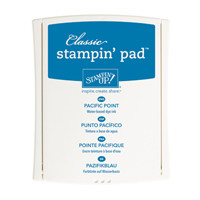
Pacific Point'n Pearls with Eastern Medallions

Happy Monday!
This past Saturday I met with a few of stamping buddies in Victoria and we had a wonderful day stamping and celebrating a birthday too!  This card is the one I made for the birthday girl and we all loved it!


Card front

Top of cardfront

Close-up of medallion - notice the pearls underneath the petals :)

Inside of Card

You will notice from the photos that there are pearls hidden under the flower petal and they play double-duty:  they provide some hidden bling (like an oyster) and they also hold up the petals from the card base!

I hope this card gives you some creative inspiration and you also give it a try.  You can replace the pearls with rhinestones too, or leave it plain, but I prefer it with the bling!

Have a wonderful week and I look forward to you stopping by again next time!

Happy Inky Smiles


Stampin' Up Supplies Used:
Tips and Tricks to Recreate this card:
Cut:
Whisper White Thick cardstock base: 11" x 4 1/4"
Whisper White scraps: Two 3" squares for the die cut stamped flowers
Pacific Point cardstock: 3 1/2" square for die cut medallion
Next:
1.  Fold your Whisper White Thick cardstock piece in half to create your card base.
2.  Die cut the large circle medallion from Pacific Point cardstock.
3.  Using Pacific Point Ink, stamp your large flower onto the Whisper White cardstock piece twice.
4.  Die cut each large flower outline as well as the inside flower.
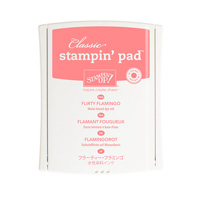
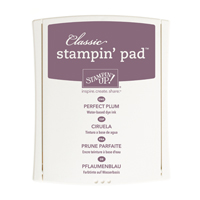
5.  Using the following ink colors, and the small decorative heart stamp, stamp each "flower petal" inside the diecut (see photos above): Peekaboo Peach, Flirty Flamingo and Perfect Plum. 
6.  Glue your Pacific Point die cut medallion to the bottom right of your card base as shown in photos above.
7.  Glue one of the stamped and die cut flower onto the Pacific Point medallion shape.
8.  Stamp your choice of greeting with Pacific Point ink onto the upper right corner of the cardbase.
9.  Glue your second flower onto the cardbase towards the upper left corner so that it looks pleasing to you.
10.  Now apply the Pearl Basic Jewels to your card as desired (use photo for ideas).
       a.  largest pearls go in the center of the flowers and underneath each petal of the flower on the Pacific                 Point Medallion.
       b.  medium sized pearls go underneath the petals of the second flower and around the points on the                   Pacific Point Medallion, and to the greeting (see photos above).
       c.  smallest pearls decorate the outside of the flower near the greeting.
       d.  a grouping of different sized pearls go onto the bottom left corner of card.
 (I used 40 pearls for this card!)

11.  Last, but not least, stamp the inside of card, as well as your envelope, as desired.
Whoo-hoo!  You are finished your beautiful card!  Enjoy!

Saturday, May 27, 2017

Seashore Stampers Blog Hop - Father's Day - Male Card


Happy Saturday and welcome to the Seashore Stampers monthly blog hop!
This month's theme is Father's Day or a card for a man.  I love working with Stampin' Up!'s Eastern Palace Suite so I created this card for the hop.


Card front
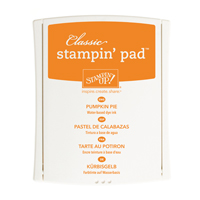
My father loved the combination of green and orange.  So I used the new upcoming Stampin' Up! In Color ink in Tranquil Tide along with Pumpkin Pie ink.


Close-up of card front
If you feel the bling of rhinestones is too much, just leave them off.  Note the rhinestones are also hiding under the flower petals (see above photo) which keep the "petals" raised up off the card. 


Inside of card
I hope this card inspires you to create one too!
Now, please carry on, or back, and enjoy the next stop on this hop:


Adrienne
Erica

Happy Inky smiles!


Stampin' Up! Supplies Used:
Tips and Tricks to Recreate this card:
Cut:
Whisper White Thick cardstock 11" x 4 1/4"
Tranquil Tide cardstock scrap: 3 1/2" square for die cutting medallion
Whisper White cardstock scrap: 3" square for die cutting and stamping large flower medallion
Next:
1.  Fold your Whisper White Thick cardstock piece in half to create your card base.
2.  Die cut the large circle medallion from the Tranquil Tide cardstock.
3.  Using Tranquil Tide Ink, stamp your large flower onto the Whisper White cardstock piece.
4.  Die cut the large flower outline as well as the inside flower.
5.  Using Pumpkin Pie Ink and the small heart stamp, stamp each "flower petal" inside the diecut (see photos above).
6.  Glue your Tranquil Tide die cut medallion to the bottom left of your card base as shown in photos above.
7.  Glue your stamped and die cut flower onto the Tranquil Tide medallion shape.
8.  Ink up the decorative swish with Pumpkin Pie Ink and stamp around the medallion, and in the upper right corner of the card base (as shown in photos above).
9.  Ink up your greeting of choice with Tranquil Tide Ink and stamp onto card base.
10.  Apply Basic Rhinestone Jewels to card as desired (use photo for ideas).
11.  Stamp up inside of card, as well as your envelope, as desired.
Whoo-hoo!  You are finished your card!  Enjoy!


Monday, May 22, 2017

Happy Birthday Card Using Tranquil Tide Cardstock

Happy Monday everyone!

Today I wish to share another card I made using the Eastern Beauty stamp set and the Eastern Medallion Thinlits dies from Stampin' Up!.  I really love using these two sets right now!  I also used the Happy Birthday Greeting from the Happy Birthday Gorgeous stamp set, which I feel looks great!  What do you think?

Card front
Close-up of top part of card

Close-up of bottom part of card

I hope you like this card and it inspires you to try it too.
Have a great week and I look forward to you stopping by again next week.


Stampin' Up! Supplies Used:
Tips and Tricks to Recreate this card:
Cut:
Whisper White Thick card base: 11" x 4 1/4"
Tranquil Tide cardstock mat:  5 1/4" x 4"
Flirty Flamingo cardstock scrap: 3" square 
Whisper White cardstock scrap:  2 1/2" square
Next:
1. Fold your cardstock base in half.
2. Take the large Eastern Medallion die, place onto the Tranquil Tide cardstock mat and diecut out using your Big Shot machine.  Cut the die away from the cardstock.
3.  Die cut the same large Eastern medallion die again from the scrap of Flirty Flamingo cardstock. Cut out the die shape from the cardstock.
4. Using Tranquil Tide Ink stamp the flower shape and then die cut using the matching die.
5.  Using Flirty Flamingo Ink, stamp the small heart design onto each petal (see photo for placement).
6.  Using Versa Mark Ink, stamp the "Happy Birthday" greeting onto the Tranquil Tide cardstock mat (see photo) and then cover the greeting with White Embossing Powder and heat set using your Heat Tool.
7.  Take the Flirty Flamingo ribbon and wrap around the left hand side of the Tranquil Tide Cardstock mat (see photo) and tie a knot.  Secure the knot to the cardstock base with a mini glue dot.
8.  Attach the Tranquil Tide cardstock mat to your card base.
9.  Glue your Flirty Flamingo die cut medallion into the cutout circle (see photo).
10.  Glue the die cut and stamped flower medallion to the center of the Flirty Flamingo medallion.
11.  Attach the Gold Faceted Gems and the Pearl Basic Jewels to the Tranquil Tide cardstock mat as desired, or shown in the photo.
12.  Stamp the inside of your card as desired.
13.  Stamp the matching envelop, again as desired.
You are done!  Enjoy your own stamped creation!