Showing posts with label Deliightful Daisy DSP. Show all posts

Saturday, August 26, 2017

Sea Shore Stampers Blog Hop - Something Other Than a Card

Happy Saturday stamping friends!


Welcome to this month's Seashore Stampers' Blog Hop! 

This month our group is sharing a paper project that is not a card so that we get to "step outside the box" in a good way.  I love creating cards so making something else other than a card required a bit more thought.  This is what I came up with:  


Explosion Gift Box

My share is a version of the Explosion Gift Box you see all over the internet and on other blogs.  I really enjoyed making this box and I hope it gives you motivation to create one too!  I know seeing all the other lovely box creations motivated me!


Close-up of box 


Inside of opened box


Box lid without top decoration

Open box and box lid

Box topper unassembled


Componets of box before assembly


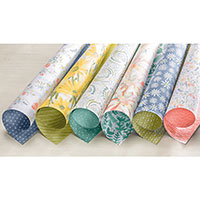
For those of you who are DSP lovers, you will notice I used the Delightful Daisy Designer Series Paper from Stampin' Up! along with the Bold Butterfly Framelit dies.  You can certainly dress up the box using any DPS you have on hand together with other dies and stamps (I actually didn't do any stamping for this project - unusual for me!).  There are so many wonderful combination of ideas out on the internet I know you won't run out of inspiration! 

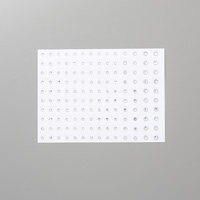
Of course, I love bling (who doesn't), and you will see I added lots of Rhinestone Basic Jewels to my gift box.  You can also add jewels and bling to the inside of the box but I left my plain (basically because I ran out of rhinestones - note to self: need to order more :) )


Have a wonderful weekend and see you again soon!


P.S.  This gift box is for my mom! :) 

Now please check out the other blogs participating in this hop:


Erica
Adrienne


Stampin' Up Supplies Used:


Monday, July 10, 2017

Make a Wish Dragonfly (Bumble Bee) Card

Hello stamping friend.  Thanks for stopping by today!

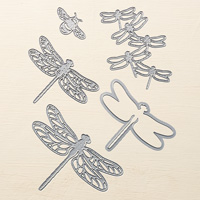
I want to show you a card I made this past week using left over supplies from the Happy Bumble Bee Trio of cards (I didn't want the scaps to go to waste).  I love the bumble bee die from the Dragonfly Thinlits set from Stampin' Up! - and I still have to find time to play with the dragonflies (If anyone has an idea on how to stretch more hours into a day, let me know!).  These bees remind me of the bees humming away in my garden - I love watching how they buzz from flower to flower. I find it very relaxing watching the bees work their magic.

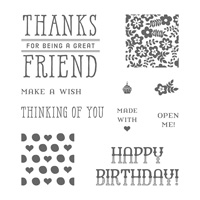
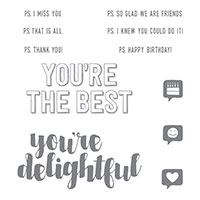
So, back to the card: I added the greetings from the Stampin' Up! stamp set called Window Shopping and I blinged up the DSP by glittering up the centers of the flowers.  I think this combo goes well together, don't you? 


Card front


Close-up of card front


Inside of card

This was a very easy card to put together - especially since I had scraps from last week's card trio :)
I hope you give it a try.


Have a wonderful week!


Stampin' Up Supplies Used:

Tips and Tricks to Recreate these cards:
Cut:
Old Olive Cardstock:  11" x 4 1/4"
Whisper White cardstock for inside: 5" x 3 3/4"
Old Olive cardstock scrap for inside die cut bumblebee: approx. 2" 
Basic Black mat: 4 1/4" x 2 3/4" (you need to die cut 2 black bumble bees from the centre of this cardstock too)
Delightful Daisy DSP: 4 1/8" x 2 5/8"
Next:
1. After you have die cut two bumbles from the centre of the Basic Black cardstock, glue your DSP piece to the black cardstock.
2. Wrap the white bakers' twine three times around the bottom area of this mat piece and tie a bow (remember to lock in a 1 1/4" length of the mini gold sequin trim before you complete the bow). I place a glue dot to the backside of the tied bow so it stays in place on my matted card piece.
3. Then use your Basic Black ink and your greeting and use your matted piece to determine where to stamp your greeting onto your Old Olive cardstock base.
4. I then attached the matted piece to my card front with stampin' dimensionals (see photos above).
6. Then I die cut all my honey bees and glued them to the card as shown in photos.
7. I stamped and glued my Whisper White cardstock to the inside of my card.
8.  I then glittered up my DSP and bee antenae by applying Fine Tip Glue to areas that denoted the center of the sunflowers.  Then I applied glitter to the glue before it dried (don't worry - it takes quite a while before it dries!)
Now that was fun!  Go give your card to someone you love!

Monday, July 3, 2017

Happy Bumble Bee Trio

Hello and welcome stamping friend!

Today I wish to share a trio of cards I made this past week using Stampin' Up!'s Detailed Dragonfly Thinlits and the You're Delightful hostess stamp set.  I also used the Designer Series Paper pack called Delightful Daisy.

May your creative juices flow too!

The Trio

Card #1

Card #2

Card #3

Card #1 closeup

Card #3 closeup

See you again next week!

Stampin' Up! Supplies Used:
Tips and Tricks to Recreate these cards:
Cut:
For Card #1:
Whisper White Thick cardstock:  8 1/2" x 5 1/2"
Whisper White cardstock for mat: 5 1/4" x 4"
Old Olive cardstock scrap: 3 1/2" square and a 2" x 3" strip for the die cut honey bees and the punched classic label strip
Delightful Daisy DSP: 2 5/8" square
Basic Black cardstock scrap: 2" x 3" for black die cut honey bees
Whisper White scrap for stamped and classic label punched greeting
Gold Glimmer paper scrap for punched classic label piece
For Card #2:
Old Olive cardstock: 11" x 4 1/4"
Whisper White cardstock mat: 5 1/4" x 4"
Old Olive cardstock scrap: 3 1/2" square for die cut scalloped square and a 2" x 3" strip for the die cut honey bees and the punched classic label strip
Delightful Daisy DSP: 2 5/8" square
Calypso Coral carststock scrap for die cut honey bees one classic label punch strip
Gold Glimmer paper scrap: 3" x 1/2" for banner strip and another strip for classic label punched strip
For Card #3:
Whisper White Thick cardstock base:  8 1/2" x 4 1/4"
Old Olive cardstock scrap: 3 1/2" square for die cut scalloped square
Delightful Daisy DSP: 2 5/8" square
Daffodil Delightful cardstock scrap: 2" x 3" for die cut honey bees
Basis Black cardstock scrap: 2" x 3" for die cut honey bees
Whisper White scrap for stamped images
Next:
1. Using photos above cut, stamp and assemble cards as shown
2. I embossed my card front mats first.
3. Then cut and assembled the Old Olive scalloped square with the Delightful Daisy DSP.
4. I wrapped the assembled scalloped square with the ribbon/linen thread
5. I then attached the square to my card front/mat with stampin' dimensionals.
6. Then I die cut all my honey bees and glued them to the card as shown in photos.
7. I then inked and stamped my greetings as shown onto scrap and punched out with the classic label punch (and for Card #3, I stamped greeting directly onto bottom of card front).
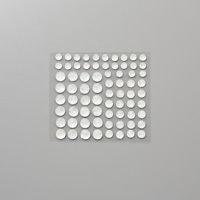
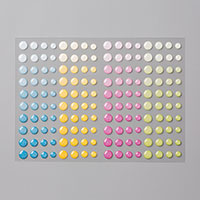
8.  Last, I used the Glitter Emamel Dots to decorate as desired (use photos for ideas).
Enjoy your creations (can you imagine the may different color combinations and other DSP you can try out? whoo-hoo - this will keep us all busy for quite some time to come!)