
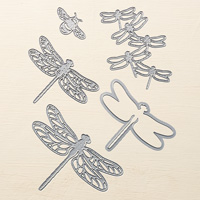
I want to show you a card I made this past week using left over supplies from the Happy Bumble Bee Trio of cards (I didn't want the scaps to go to waste). I love the bumble bee die from the Dragonfly Thinlits set from Stampin' Up! - and I still have to find time to play with the dragonflies (If anyone has an idea on how to stretch more hours into a day, let me know!). These bees remind me of the bees humming away in my garden - I love watching how they buzz from flower to flower. I find it very relaxing watching the bees work their magic.
So, back to the card: I added the greetings from the Stampin' Up! stamp set called Window Shopping and I blinged up the DSP by glittering up the centers of the flowers. I think this combo goes well together, don't you?
 |
| Card front |
 |
| Close-up of card front |
 |
| Inside of card |
This was a very easy card to put together - especially since I had scraps from last week's card trio :)
I hope you give it a try.
Have a wonderful week!

Stampin' Up Supplies Used:


Cut:
Old Olive Cardstock: 11" x 4 1/4"
Whisper White cardstock for inside: 5" x 3 3/4"
Old Olive cardstock scrap for inside die cut bumblebee: approx. 2"
Basic Black mat: 4 1/4" x 2 3/4" (you need to die cut 2 black bumble bees from the centre of this cardstock too)
Delightful Daisy DSP: 4 1/8" x 2 5/8"
Next:
1. After you have die cut two bumbles from the centre of the Basic Black cardstock, glue your DSP piece to the black cardstock.
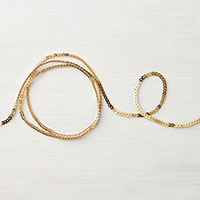
2. Wrap the white bakers' twine three times around the bottom area of this mat piece and tie a bow (remember to lock in a 1 1/4" length of the mini gold sequin trim before you complete the bow). I place a glue dot to the backside of the tied bow so it stays in place on my matted card piece.
3. Then use your Basic Black ink and your greeting and use your matted piece to determine where to stamp your greeting onto your Old Olive cardstock base.
4. I then attached the matted piece to my card front with stampin' dimensionals (see photos above).
6. Then I die cut all my honey bees and glued them to the card as shown in photos.
7. I stamped and glued my Whisper White cardstock to the inside of my card.
8. I then glittered up my DSP and bee antenae by applying Fine Tip Glue to areas that denoted the center of the sunflowers. Then I applied glitter to the glue before it dried (don't worry - it takes quite a while before it dries!)
Now that was fun! Go give your card to someone you love!
No comments:
Post a Comment