
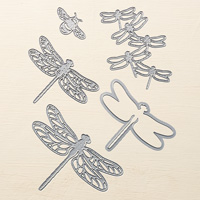
Today I wish to share a trio of cards I made this past week using Stampin' Up!'s Detailed Dragonfly Thinlits and the You're Delightful hostess stamp set. I also used the Designer Series Paper pack called Delightful Daisy.
May your creative juices flow too!
 |
| The Trio |
 |
| Card #1 |
 |
| Card #2 |
 |
| Card #3 |
 |
| Card #1 closeup |
 |
| Card #3 closeup |
See you again next week!


Tips and Tricks to Recreate these cards:
Cut:
For Card #1:
Whisper White Thick cardstock: 8 1/2" x 5 1/2"
Whisper White cardstock for mat: 5 1/4" x 4"
Old Olive cardstock scrap: 3 1/2" square and a 2" x 3" strip for the die cut honey bees and the punched classic label strip
Delightful Daisy DSP: 2 5/8" square
Basic Black cardstock scrap: 2" x 3" for black die cut honey bees
Whisper White scrap for stamped and classic label punched greeting
Gold Glimmer paper scrap for punched classic label piece
For Card #2:
Old Olive cardstock: 11" x 4 1/4"
Whisper White cardstock mat: 5 1/4" x 4"
Old Olive cardstock scrap: 3 1/2" square for die cut scalloped square and a 2" x 3" strip for the die cut honey bees and the punched classic label strip
Delightful Daisy DSP: 2 5/8" square
Calypso Coral carststock scrap for die cut honey bees one classic label punch strip
Gold Glimmer paper scrap: 3" x 1/2" for banner strip and another strip for classic label punched strip
For Card #3:
Whisper White Thick cardstock base: 8 1/2" x 4 1/4"
Old Olive cardstock scrap: 3 1/2" square for die cut scalloped square
Delightful Daisy DSP: 2 5/8" square
Daffodil Delightful cardstock scrap: 2" x 3" for die cut honey bees
Basis Black cardstock scrap: 2" x 3" for die cut honey bees
Whisper White scrap for stamped images
Next:
1. Using photos above cut, stamp and assemble cards as shown
2. I embossed my card front mats first.
3. Then cut and assembled the Old Olive scalloped square with the Delightful Daisy DSP.
4. I wrapped the assembled scalloped square with the ribbon/linen thread
5. I then attached the square to my card front/mat with stampin' dimensionals.
6. Then I die cut all my honey bees and glued them to the card as shown in photos.
7. I then inked and stamped my greetings as shown onto scrap and punched out with the classic label punch (and for Card #3, I stamped greeting directly onto bottom of card front).
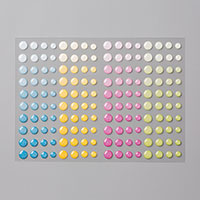
8. Last, I used the Glitter Emamel Dots to decorate as desired (use photos for ideas).
Enjoy your creations (can you imagine the may different color combinations and other DSP you can try out? whoo-hoo - this will keep us all busy for quite some time to come!)
No comments:
Post a Comment